Tag Archives: Gail’s Stitch Samples

My Couching Sample

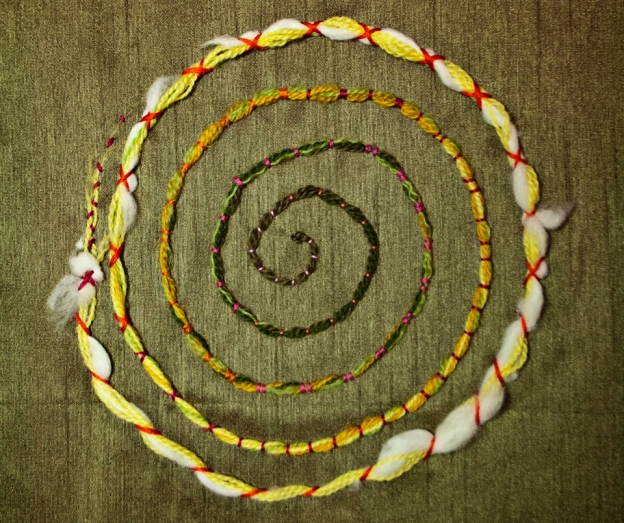
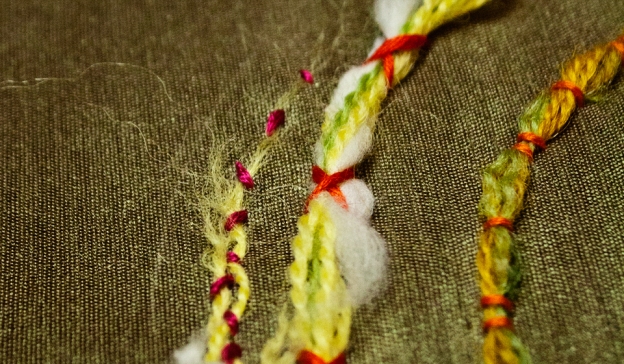
Couching stitch sample: floss over crewel yarn and unspun cotton fiber

I put this off for a while, knowing I wanted to use the beautiful cotton fibers I was given, but a little intimidated. I worked up my courage and finally got it done!

Couching spiral

A friend/workmate of my daughter who lives in Arizona grew some cotton for a program, and  lucky, lucky me, I was given a whole shopping bag full!!! It has been ginned, but below you can see at least one little cotton seed hung on tight and made it through! I like that.

cotton seed left in my ginned, unspun gift of cotton

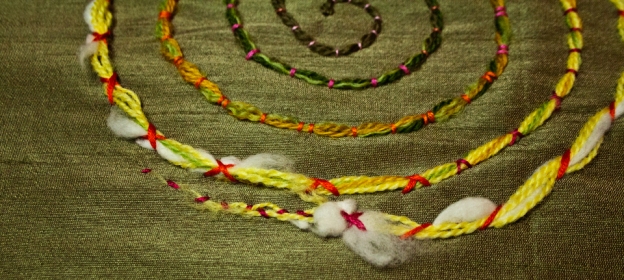
The fibers are silky and long — it must be a pima-type of southwest USA cotton fame. I was told, but I have forgotten. I started adding in the cotton near the end: some finger-made strands I found in the top of the bag, and a tiny clump I played with first.

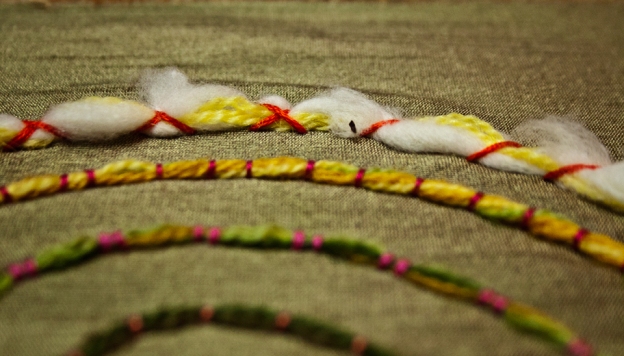
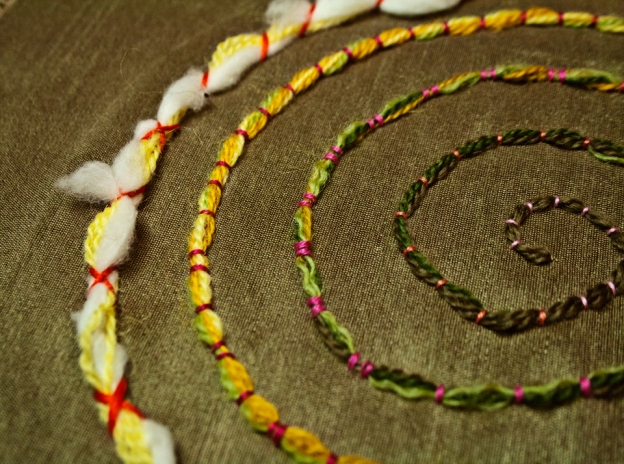
Couching sample: crewel yarn and cotton couched with floss

I couched using DMC flosses in increasingly brilliant pinks and oranges, and couched down some old crewel yarns I had leftover from probably these basket of flowers and apple kits I did when I was about 12.

I worked the yarns all the way down to the last few fibers :)I couched those yarn ends (they were hard to break/shred!) down to the very last fibers 🙂

The background is a polyester special occasion fabric I picked up a remnant of, just for my CQ basket. It is a changeable olive/antique gold.

Couching stitch sample: floss over crewel yarn and unspun cotton fiber

I look forward to doing some more formal couching on CQ blocks, but this has definitely shown me how much fun I could have using couching in my doodle stitching, too!

Happy Stitching!

Gail

My Running Stitch Sample

I decided to use Running stitch on a project instead of making a flat stitch sample. (I’ll add some variations to my couching sample when I finally can do it. edited in: Or not. But I’ll work them soon.) I blogged this whole project at my main blog (link below) but here’s what I made.

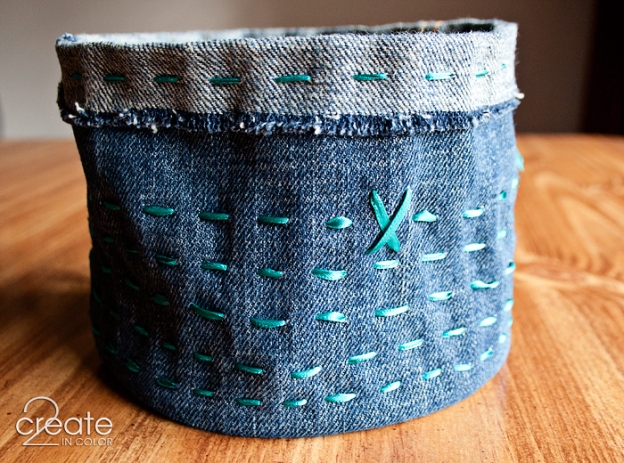
Running Stitch on denimThis little denim bucket is about 6 inches across and made entirely by hand with my embroidery supplies and part of the leg from a worn-out pair of jeans.

There’s a single large cross stitch on each side just for a fun accent.

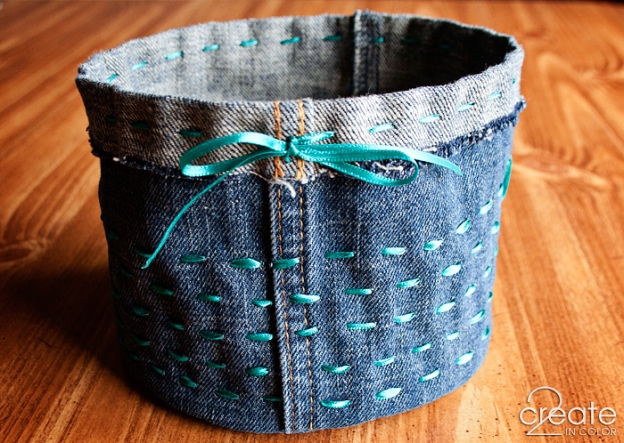
My finished denim bucket with running stitchThere is no other structure to this bucket besides its own flat fell seam, the stiffness of denim, and the french seam I used to attach the bottom circle. Denim french seams are VERY full of body LOL!

I used non-standard embroidery supplies here! The ribbon is a cheap 1/8″ polyester satin ribbon from a line we know here in the US as Offray Spool o’ Ribbon. I used a chenille needle, and I intentionally let the ribbon twist and bunch for this project. I don’t think I could have made it behave any differently in any case.

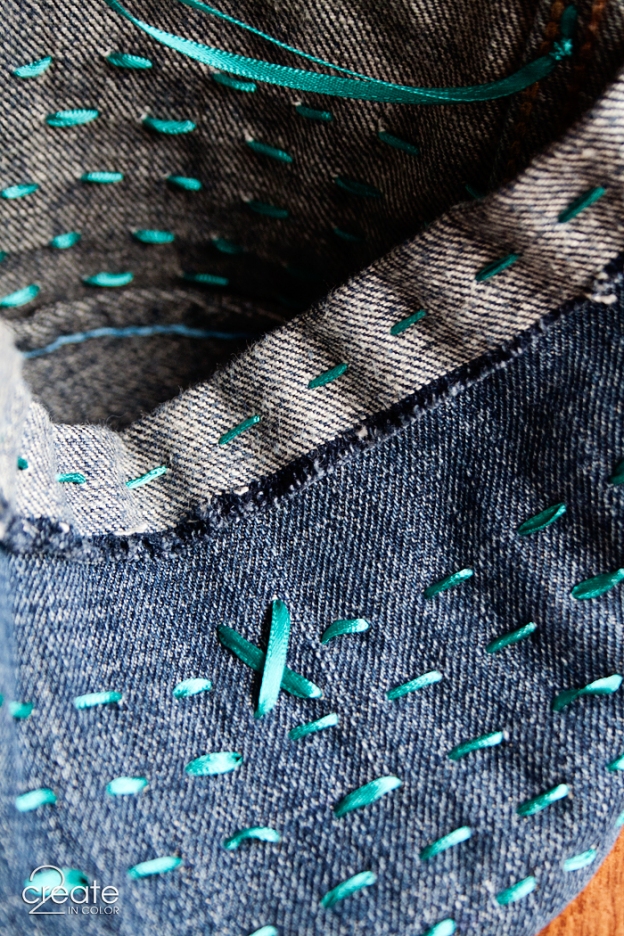
Inside and outside; french seam in blue embroidery flossI have a big plastic bag of off-brand and very old embroidery floss I keep meaning to donate to an after school program. I dug into it and used a ca. 1972 skein of light blue J.P. Coats embroidery floss to stitch the not-quite-backstitch seam that enclosed the raw edges of the french seam. You can catch a glimpse of it above.

Note about my not-quite-backstitch: I find that my variation of a hand-stitched seam spreads the strain out over the fabric better than a true backstitch, especially when the seam will see some stretching. I work it like backstitch with one exception: I don’t back up all the way to the previous stitch — the backstitch side looks like a line of short running stitch. Instead of two needle holes per stitch, I make three. I found this out — created it — when having to do some mending for the second time on a camping trip 🙂

Links to my simple running stitch embroidery mentioned above …

Denim Bucket creative details: http://www.2createincolor.com/2013/04/06/a-denim-bucket/

Doodle Stitching — see especially the last photo of the post to notice the running stitch. Don’t miss the mug with a stitch-darning heart 🙂  http://www.2createincolor.com/2012/07/05/very-basic-embroidery/

A Garden of Chain Stitch Samples

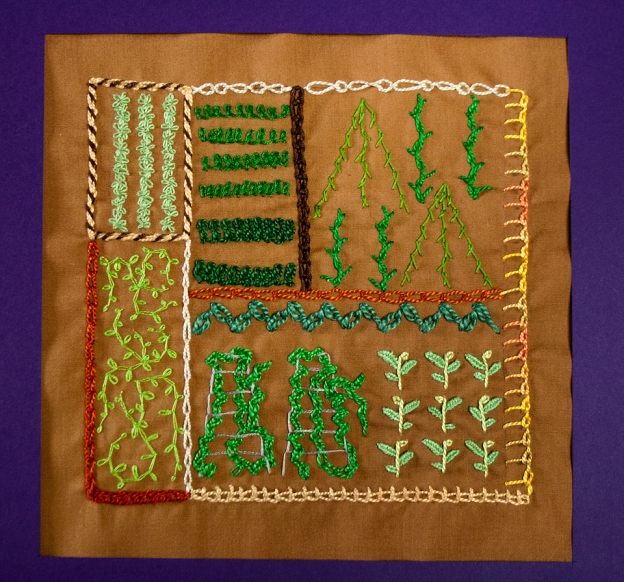
IMG_0246 Garden of Chain Stitches

I never dreamed there were so many variations of Chain Stitch! It has always been one of my favorites. In my teenage years I would often stitch loopy lazy daisies on things — even now, typing this, I remember that I put that as my identifying mark on all my towels before I went off to college 🙂 That’s a happy memory!

Once I started thinking about doing my weekly TAST stitching for weeks #7 Detached Chain and #8 Chain, and realized just how many variations I had listed, I thought something more than just my normal doodle cloth experiments would be nice.
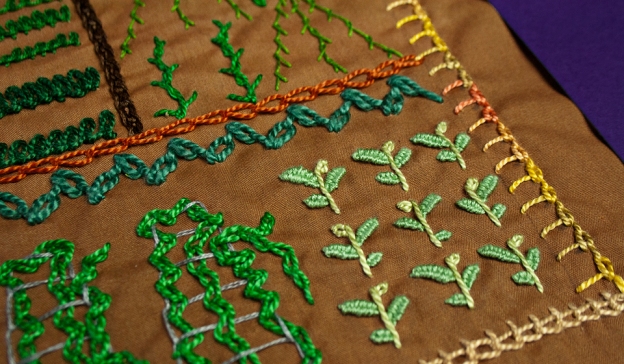
IMG_0260 Chard, tomatoes on trellises, and peppers. Can you imagine it?

And suddenly I needed to stitch up a garden! I guess it makes sense with spring being in the air. Plus I love all things green 🙂 including herbs and vegetables! Certainly there were enough variations of chain stitch for a garden of leaves.

Here’s the run down on my garden, from top left across, to bottom right:

  • Detached chain Stitch “lettuce rows” (used my new awesome coton a broder)
  • Rosette Stitch “spinach” (aah, yes, need lots more practice on this finicky stitch)
  • Alternate Barred Chain and Barred Chain for the “beans” and “corn” (Some of the twists have been inverted*, so the barb sticks out from underneath instead of on top — just playing around.) Oh, and I forgot these got their own week later! I was in a chain stitch frenzy!
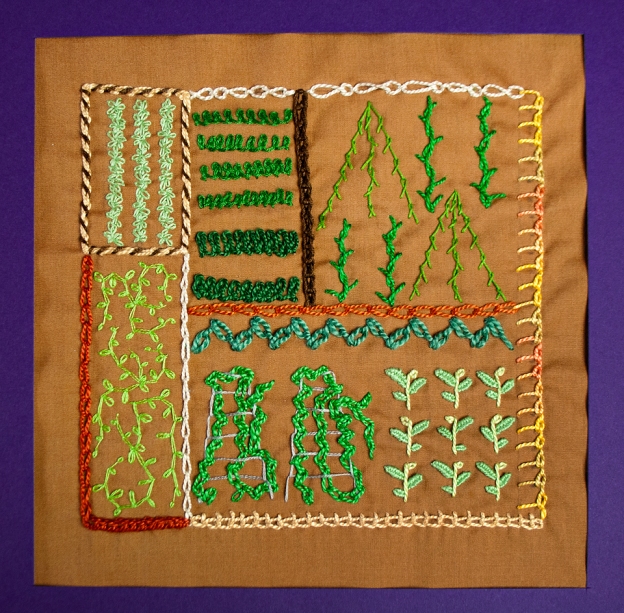
Garden of Chain Stitch variations

more

  • Chain (very long skinny ones in a single strand of floss) and Detached Chain for the … let’s call ’em “cucumber vines”
  • Feathered Chain for the “chard” in the beefy size 3 perle cotton
  • Open Chain for the trellises (gray)
  • Zig Zag Chain for the … some other kind of climby vine vegetable! Tomatoes?
  • Woven Detached Chain for the “peppers” in a double strand of coton a broder; double strand was not the best idea in the world. 
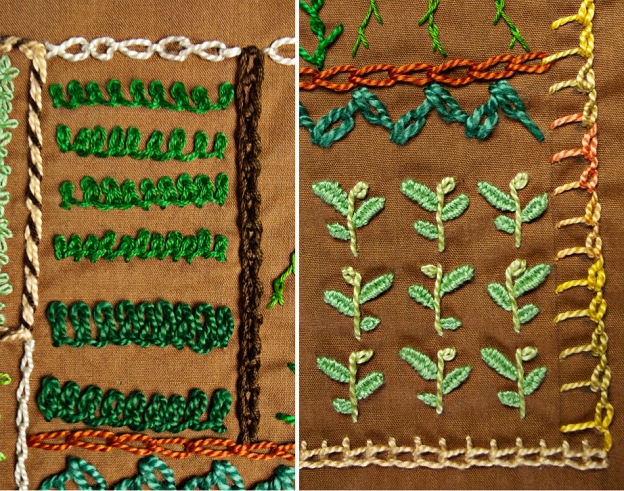
Chain-sampler-detail-collage

The garden beds are defined by (counter clockwise):

Whipped chain (tan/brown), Chain and Reverse chain (vertical lower left, switching in the middle), Heavy Chain (horizontal lower left), Sailor Stitch (bottom, tan), Sailor’s Knot (vertical right), and —

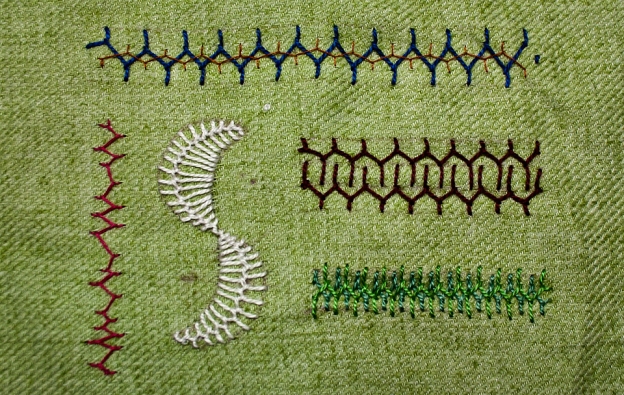
— My own combination/variation needing a name!* (top edge) I think this combination stitch looks kind of like a jewelry chain — what do you think?

My new combination of Twisted and Reverse Chain stitch

My new combination of Twisted and Reverse Chain stitch

Continuing through the middle borders: my own variation of a double-whipped chain* (brown, vertical center), Ye Olde Basick Chaine (center horizontal) and a long, barely Twisted chain (tan, inner left.)
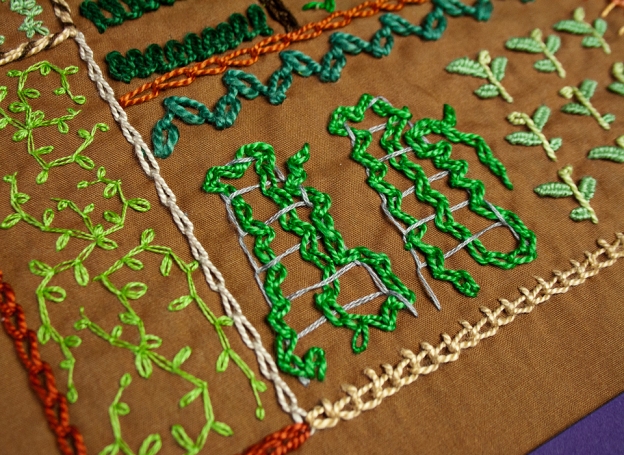
IMG_0258 zig zag, open chain variations

* In the spirit of experimenting, and because the already-included FIFTEEN STITCHES  weren’t enough (right?) I got creative. That’s code for: I can never leave well enough alone LOL Here are the details if you want:

  • when I was working the Alternate Barred chain “corn”, I tried twisting the stitch in the opposite direction on two of the stalks, so the “leaves” appear to stick out from behind and so there is a more linear/continuous suggestion of a stalk. It’s subtle.
  • the double-whipped chain border, near the left top in dark brown, has first one edge of the stitches whipped, and then the other. It kind of pulls the stitch apart and makes it bolder; the edges have a bit more lumpy/textural appearance, too. I didn’t try it with a contrasting color, but I will be.
  • and my own creation, the two-stitch combination using both twisted, and the reverse technique. One longish twisted chain is worked, with a bit longer anchor stitch than normally needed. A short reverse chain is worked into that anchor stitch. I made it short enough that it looks roundish with my thread choice (that was my intent, anyway.) The “feet” of the next twisted chain are tucked inside and overlapping the feet of the reverse stitch. All of the entry and exit points for both types of chain stitch used are worked the same small distance away from the center stitching line. 

I really like the rhythm of this combo I put together — so far, it is like the rhythm of a 5th grade band: a little rough but you know what it should be 😉 My spacing is getting better as the weeks go by, but I know I have a ways to go!
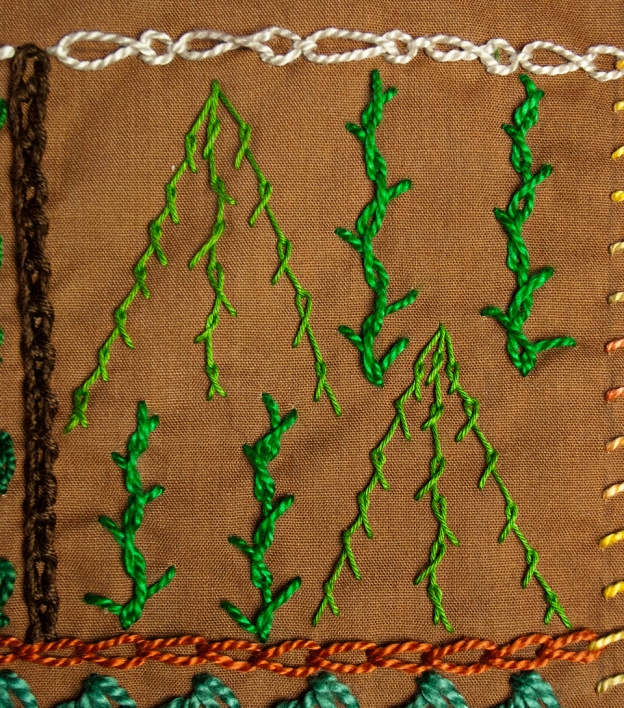
IMG_0262 corn and beans, barred chain

Making this project was a fun way to enjoy all the chain stitch variations, but with all the other creative thoughts and projects whizzing around in my house and my head, I’ll be making a boring, first-timer doodle cloth style of sampler for Couching!

Happy Stitching!

Gail
My Herringbone Stitch Sample

Pintangle visitors: be sure to see my 17 Chain-stitch Garden 🙂Herringbone Stitch play

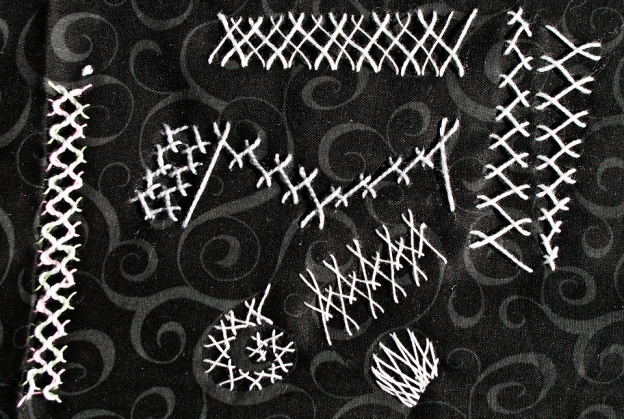
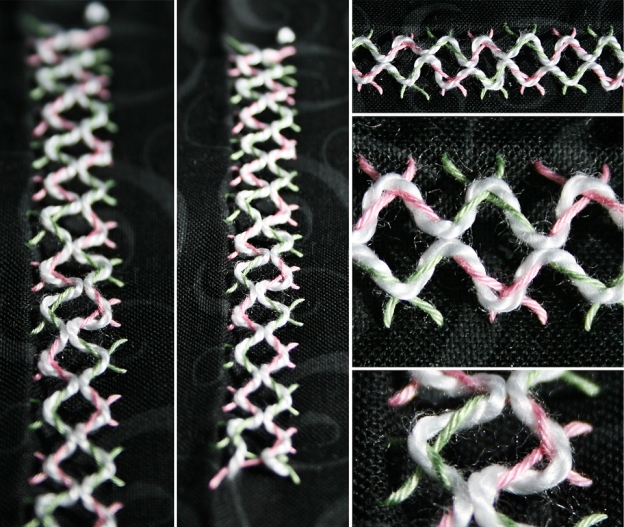
In a rare instance of black/white inspiration, I stitched my Herringbone Stitch samples. The black/white didn’t hold through the stitching session — I ended up with pink and green stitches as the basis for my Twisted Lattice Band variation on the left.

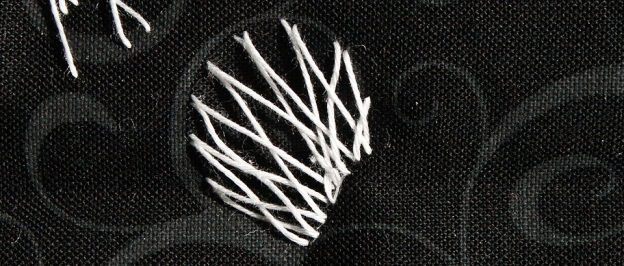
Basic Herringbone in wedges.Because I couldn’t draw guidelines on my black fabric with the marking tools I had at hand, I decided to be a free spirit and stitch away! I always get smaller as I work to the right — I’ve overcome it in writing large letters, but not in stitching. Therefore I intentionally made a wedge shaped stitch sample. Twice 🙂

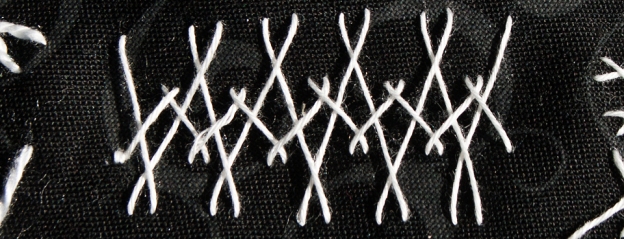
Varied sizes of HerringboneMore playtime, getting used to the rhythm of the stitch. This can easily give a stitcher a cross-stitch effect, something I want to beware of. I used some of my new DMC Coton a Broder for most of the following samples. It looks much smoother and a bit smaller than the size 5 cotton perle (in white and in silver-gray) above.

Layered Herringbone, not the interwoven variation 1See? Smaller to the right in spite of my best intentions. Chalk pencil is being added to my stitching bag! This is not the Double Herringbone Stitch version 1 but it would have been if I had looked ahead on my list. This is merely two layers of Herringbone layered over: perle 5 on the bottom, broder 25 on the top.

In the variation 1, the broder threads heading northeast would pass UNDER the perle threads heading southeast. In two colors, you can definitely see that the stitches are interwoven in a properly done Hb variation 1. Whi-i-i-ch you won’t see here today.

Herringbone space filling trial 1Trying to fill an area of the fabric’s swirl print. I kept snagging through the thread with my needle when coming out of the fabric for later stitches. Something I need to watch out for, for sure! You can see my snaggy mess there in the bottom middle — I didn’t notice it until I was done. This broder thread draws through the fabric so very smoothly; I definitely like it!

Herringbone shape filling 2Another trial of shape filling using the print on the fabric. A little awkward. Must try this with Chevron instead.

Two layers of Herringbone, not an official variationYou see another snagged thread here 😦 But I like this set of layered Herringbone stitches. Lots of “pointy” going on here!

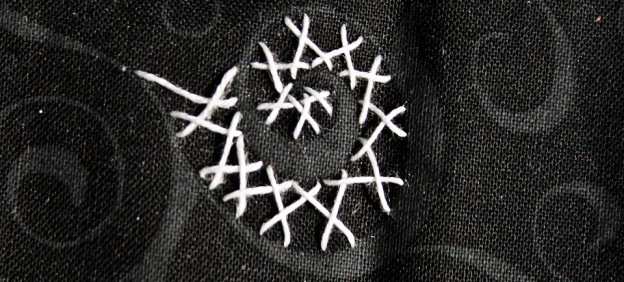
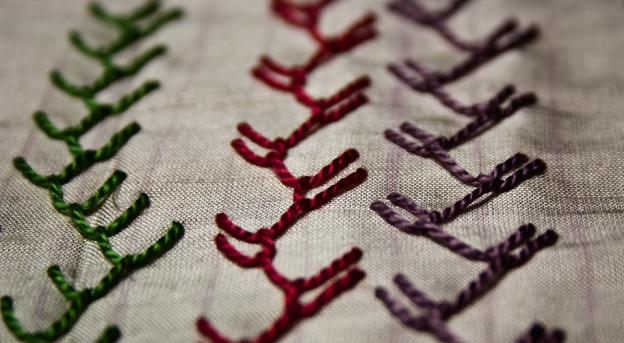
Twisted Lattice Band Herringbone variationHere’s my favorite, even though I didn’t expect it to be. Twisted Lattice Band variation uses the Herringbone variation 1 I described above as being interwoven. You can’t see it under the threaded perle cotton, but I did the pink and green broder herringbone foundation stitches properly 🙂

HB laced-herringbone-collage

And because this was my favorite (could it have to do with the spring-like colors?) I bent my achy back over and took some low-angle shots 🙂
Tip on the lacing: get the tension right the first time; it is really hard to go back and re-distribute the lacing thread.

I didn’t get around to Double Herringbone Stitch version 2, but it is simply layered — not interwoven — with the second layer’s stitches placed so the threads hug the first layer’s crossover points. I’ll remember that, because I like these X-ey stitches layered on top of each other so much.

Gail

My Chevron Stitch Samples

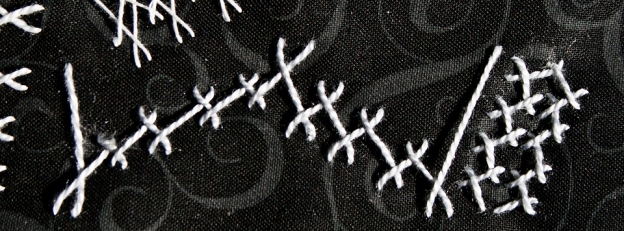
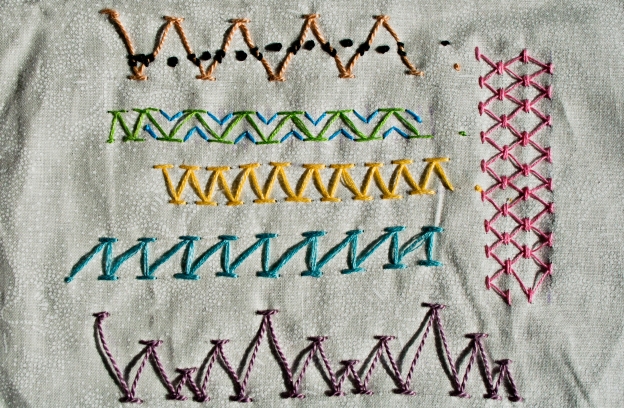
Chevron stitch samples for TASTChevron stitch, one of the foundations of CQ for embellishing! I am glad to know it better!

yellow-basicThe basics.

change up the angle...Change up the angles, so one leg is perpendicular to the direction of the stitch row. This makes me think of goosestepping soldiers.

with straight stitchesI added some turqoise straight stitches to the green chevron stitch row. This photo makes it look a bit different. I took it in bright sun and the shadows above the top row end up making it lookec curved up there. In reality, both top and bottom are sharp and angular zig-zags. I can think of plenty of ways to embellish this variation.

knots and couchingThe black stitches don’t show any texture here — sorry for the blobbiness. I blame the sun, but I never hold grudges against the sun. Here in the Pacific Northwest USA we cherish every ray 🙂 Anyway, this was supposed to come off as a wave of knots and couching stitches, but wasn’t very successful. I am not much for couching yet, so I see how this really threw things off. But I think it has potential!
pink-stacked-detailStacked stitches. I’m not sure why the left side looks so wonky! :/ I would draw this out when I do it again. I think it looks argyle-ish. I like it. I want to accent it with a couched lattice overlay in, say, 1 strand of floss to make it look VERY argyle.

chevron varied heightsThis is my favorite, even though the shadows make it look ridiculous! 🙂 The varied heights would be fun to use to set the rhythm for larger accent work.

I like Chevron stitch. I think I have it lodged securely in my head now, so that I can use it instead of just consider it  but then pass on by.

No artsy shots — too many aches and pains to go to the trouble/fun. Please let the weather stabilize for a few days!

Gail

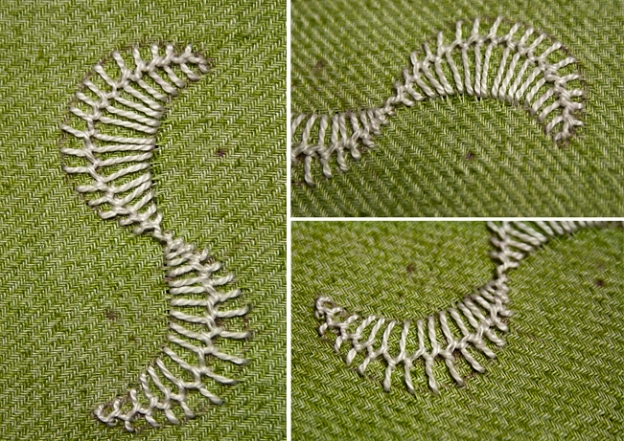
My Cretan Stitch Samples

IMG_9499

My set of Cretan Stitch samples (week 4.) Yes, I am a stitch behind! I am on vacation, so I think I’m doing pretty well 😉

IMG_9487I started off with a line of basic Cretan stitch. Then, remembering something from the Pintangle info, I decided to fill a shape. I wanted to see how different placement of the stitches affected the look of the ridge that ran down the middle.

I also wanted to play with working stitches along radial lines. You can see my chosen center points (dots with the purple pen) in the pictures below.

Cretan-S-curve-collageTo keep the unique angular look of Cretan stitch, you can’t bring the needle out of the fabric too close to the centerline — there has to be some offset between the ends of the stitches on one side and the ends of the stitches on the other… that might not make sense to somebody else 😉 but at least it will be a good reminder to me.

IMG_9491After stitching my curvy shape, I realized that my basic stitch needed — wanted — a second layer. I like the way one strand of brassy-colored floss looks on top of the size 5 perle cotton. What bugs me about having the Cretan stitch so flattened out is that it looks like a sewing machine zig-zag with bad tension settings.

IMG_9505This is my favorite sample. I love how this nests and goes completely geometric! It also makes me want to grab a narrow ribbon and tuck it under the center. I can see myself couching with this 2-row technique.

IMG_9501Playing with some tone on tone color choices. A slightly bluer green for the under layer, then a green the same hue as the fabric, but more saturated, on top with longer arms and offset.

Being in a hotel room, taking these photos, it’s hard to get them to show the color the way I want even using Photoshop. This looks way cooler in person 🙂

IMG_9511A bit of erratic EKG Cretan stitching to fill in the space. This could be useful!

I picked up this piece of fabric at a closeout-lots fabric store. It is a home decor fabric with a thin sprayed-on foam backing. Luckily it didn’t grab the needle too much. $5.99/yd. I’ll be using it for more than stitching samples but it was nice to add some variety to what I brought with me.

Gail

My Feather Stitch Samples

Feather Stitch TAST 2012 Week 4

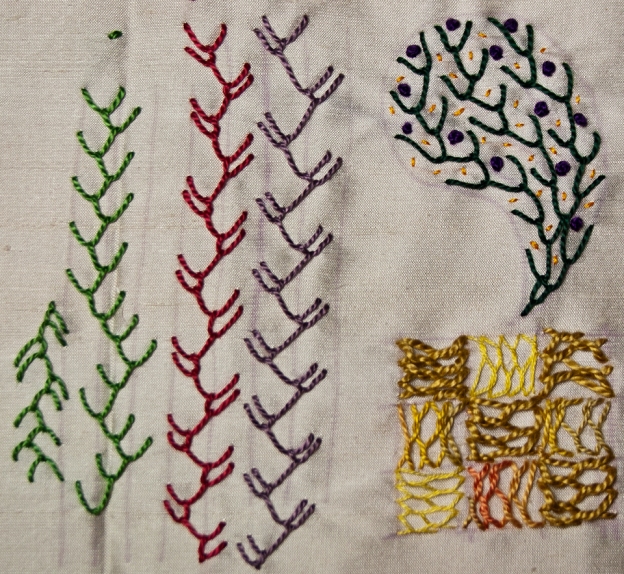
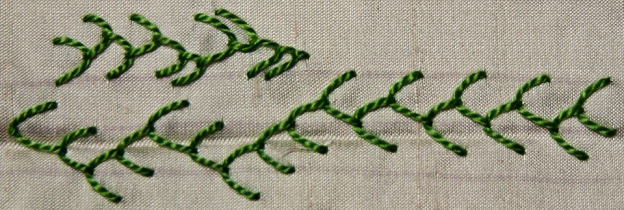
Of all the stitches I want to master, Feather Stitch is the most confusing to me. I’m not sure exactly why. When I sit down with needle and thread to do the samples, it comes together nicely; I just have to concentrate on the mechanics. Obviously I just need more practice! I made myself keep going on this sample for that reason.

Basic Feather stitch in DMC perle 5

First I worked the larger version here, with guidelines. Then since I had thread left on the needle, I came back the other way and tried some without guidelines. When I started trying the doubled stitches and running out of thread at the same time, I knew it was time to get serious about the variations!

Doubled Feather stitch in DMC perle 5.

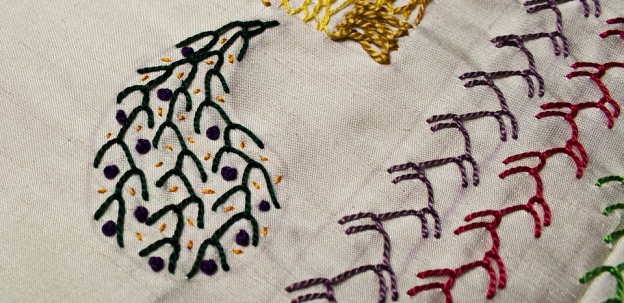
The red stitching is doubled feather stitch (does it actually have a special name when you do this?) with the second stitch’s needle holes lining up directly below (to the left, here) the first stitch’s — the needle holes all fall on the guidelines. The lavender stitching has the doubled stitch’s needle holes aligning with the angles of the previous stitches — they don’t fall on the guidelines but are shifted outward.

I think they each have a distinct look. I will be glad to have this sample to refer to.

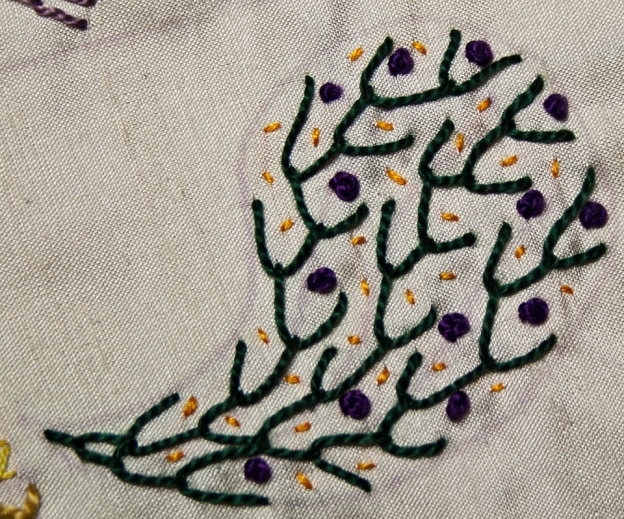
Paisley play with feather stitch, french knots, and straight stitches

I am going to assume you can see my disappearing pen line outlining a paisley shape. I love paisleys! I wanted to see what I could do using feather stitch to fill a shape. I examined some of the 2012 Feather stitch samples by both Sharon and the TAST stitchers and saw how they connected bands of the stitch together. I think this worked well! If I had continued to be ambitious with this, I would have used some buttonhole bars to scallop around the perimeter. But that’s for another day.

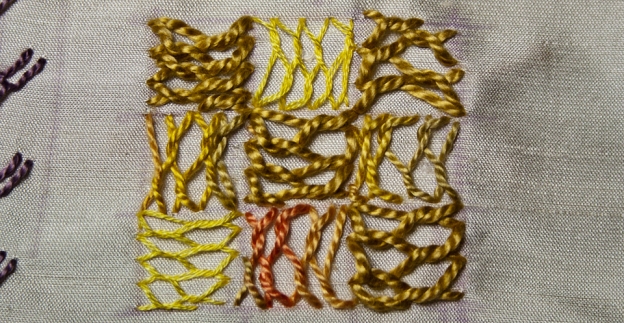
Closed Feather stitch. I don't like the thicker threads here.

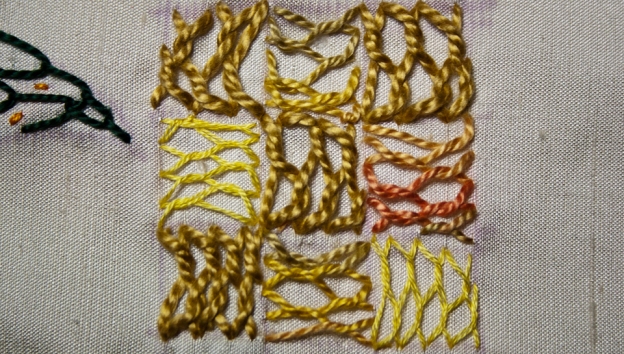
I’m uploading a couple pictures of the Closed Feather Stitch checkerboard I attempted. I don’t like it at all, but for the sake of completeness (and maybe to help another beginning stitcher) I am including it. The largest thread — size 3 perle, solid gold — was very hard to control tension-wise even though I was using a large enough needle. Plus it was the first I tried and was still figuring out the spacing etc.

from another angle:

same Closed Feather Stitch sample from another angle

Next I moved on to a (variegated) size 5 perle cotton. It was easier to pull through the fabric but I seemed to have even more trouble with the spacing and tension — it is so uneven!

Lastly I grabbed two strands of floss and worked the last two spaces in my checkerboard. I like this one the best because it lays flatter and keeps itself more normal! Lessons learned!

Feather stitch sample, upside down. Looks very different to me.

Feather stitch looks so different upside down. I am stitching on 100% silk dupioni. I have quite a collection of small yardage cuts purchased at 50% or more discount over the last few years just for my “I’m gonna be a crazy quilter!” dream. I thought I’d better start getting some experience with it 🙂

Last, as usual, a camera-play shot… but you can also see what I was trying to explain about the placement of the second stitch of each pair (red, purple).

Feather stitch samples, playing with DOF on my camera

I picked up a handful of new colors of size 5 perle cotton this week at 25% off. I’m rapidly growing addicted to NOT stitching with stranded cotton!

Gail